There are various ways to take screen shot of your mobile.In Android Kitkat version or later you can take your android screen shot without any third party software.Read How to take android screen shot without any third party app?
There are also android app to take screen shot. In this article, i am using a third party PC software to take screen shot of your mobile.I already discussed about mobogenie and it’s features. Now i will show you how to take screen shot with mobogenie.
Let’s get started,
1. You have to enable USB debugging on your phone at first.
2.Connect your Android phone to PC installed mobogenie via USB or wifi.
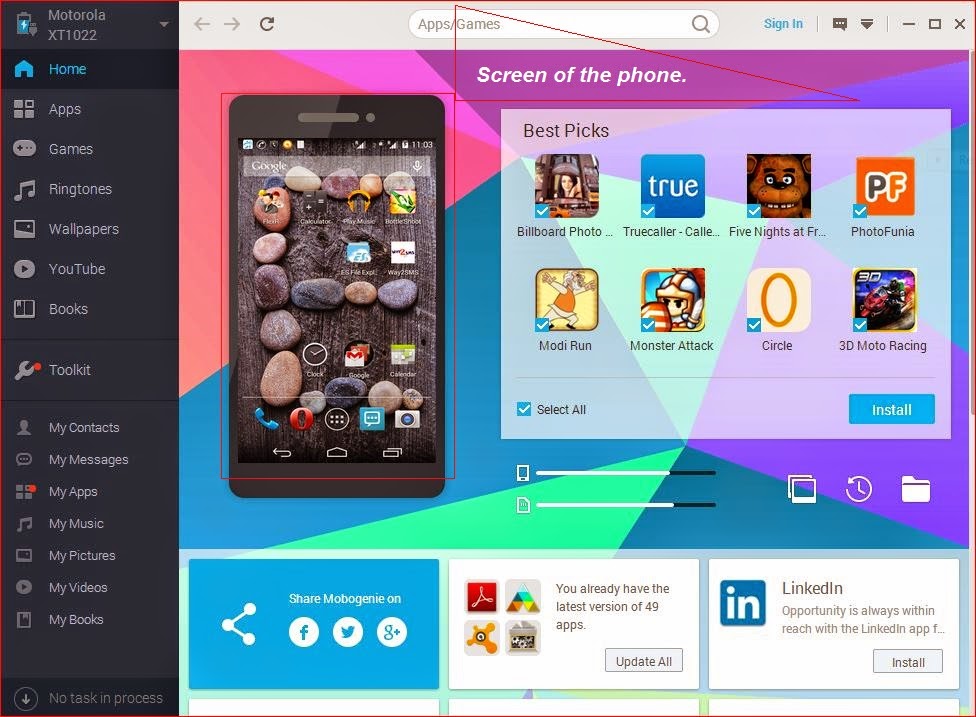
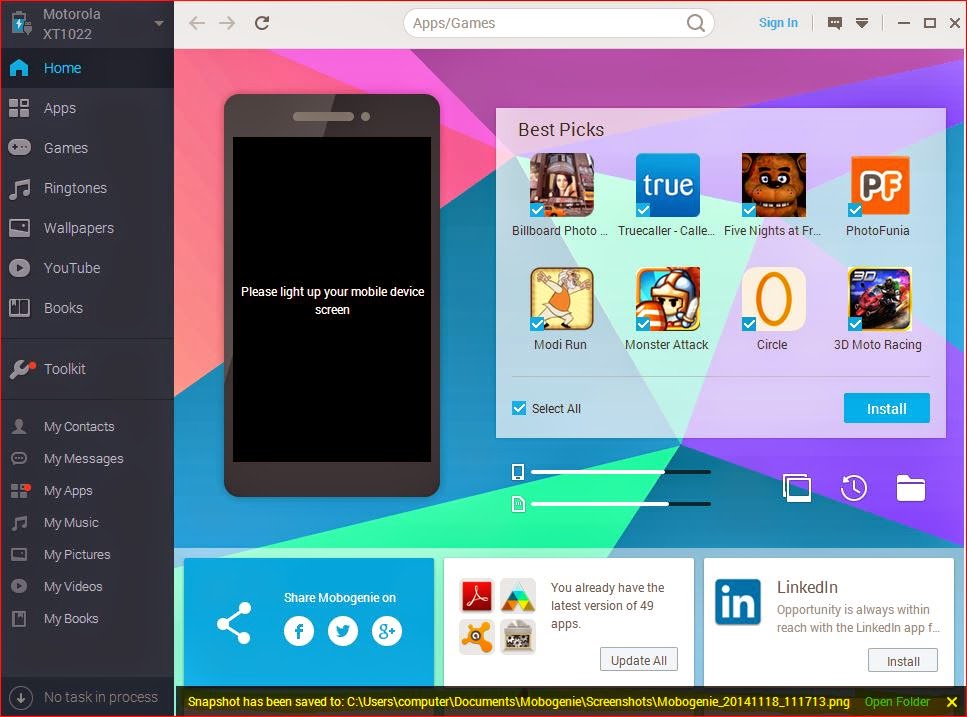
3.Now when you connected your PC to phone you see the screen of your mobile on Mobogenie interface.If you can’t see just light on your device and Click refresh on mobogenie home interface phone screen.Hover your mouse on phone screen of mobogenie interface , you will be able to see two option “Refresh” and “Capture”.Click on refresh.
4.Now go to your desired location or do whatever you want to capture.Again refresh on mobogenie home interface phone screen, you will be able to see your desired screen shot area.Click on “capture”.
5.You have successfully captured your phone’s screen.At the bottom of mobogenie a link would be shown with a name “Open Folder”.As shown highlighted below.Click on open folder.And collect the screen shot.
You have taken screenshot of your phone.Now it’s time to enjoy and share the article.


0 Comments